MapSphere GPS Logger Help
MapSphere GPS Logger is a small iPad app that allows you to record
the GPS track of your journey and upload it to MapSphere Online.
NOTE: all trips are public in MapSphere.
How to use
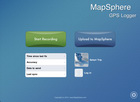
- When you start traveling, run MapSphere GPS Logger on your iPad.
- Tap the Start Recording button.
- Now you can switch to other apps or put the iPad to sleep.
The app will run in background mode and collect GPS data during your trip.
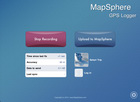
- If you do not want to record a part of the trip tap the Stop Recording button.
Do not forget to resume it again.
- After you return back from your trip, run MapSphere GPS Logger
and tap the Stop Recording button.
- Upload the recorded GPS track to MapSphere Online by taping the Upload to MapSphere button.
You should have an Internet connection (Wi-Fi is recommended).
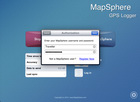
- Enter your MapSphere username and password.
If you do not have a MapSphere account,
register on MapSphere Online.
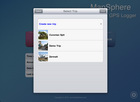
- Choose a target trip from the list or create a new one by taping Create new trip button.
- For a new trip you need to type its title and a short description. You can also modify
the proposed time of start and finish of your trip.
- Tap the Done button and wait until the GPS track is uploaded.
After that you can add photos to your trip and enjoy them
in MapSphere Trip & Photo Viewer on your iPad.
Remarks
- MapSphere GPS Logger stores all recorded tracks in GPX in the app directory.
You can extract them with iTunes.
- If you do not want to upload recorded GPS track, you can delete it by taping Settings button
at the right bottom corner and select Remove All Data.
|
|